colorize btnbmp with diagonal
I tried a test I found on this forum
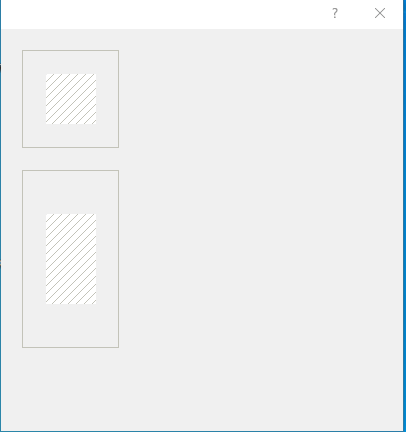
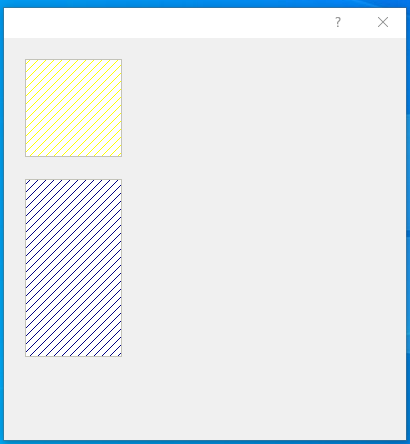
I wish have all the area of button with diagonal
so how I must make to have it ?
- Code: Select all Expand view
#include "fivewin.ch"

// colorize btnbmp with diagonal

Function test()
local oDlg
local oBtn
local lmenu:=.f.

DEFINE DIALOG oDlg SIZE 400,400

@  10, 10 BTNBMP    oBtn  SIZE 50, 50 PIXEL OF oDlg FLAT GDIP NOROUND  ; //
        RESOURCE "GRID_DWN_REC", "", LinesBmp(oBtn,50,50), "" ;
     ACTION NIL WHEN lmenu
        obtn:nClrBorder := RGB(195,195,185)

 @  70, 10 BTNBMP    oBtn  SIZE 50, 90 PIXEL OF oDlg FLAT GDIP NOROUND  ; //
        RESOURCE "GRID_DWN_REC", "", LinesBmp(oBtn,50,90), "" ;
     ACTION NIL WHEN lmenu
        obtn:nClrBorder := RGB(195,195,185)
ACTIVATE DIALOG oDlg
RETURN NIL
//---------------------------------------------------------//

Function LinesBmp(oControl,n1,n2)
   local hBmp, oBrush
   DEFINE BRUSH oBrush STYLE BDIAGONAL COLOR  Rgb(195,195,185)
   hBmp  := FW_MakeYourBitmap( n1,n2, <|hDC,w,h|
     FillRect( hDC, { 0,0,h,w }, oBrush:hBrush )
            return nil
            > )
            RELEASE BRUSH oBrush
    return hBm
I wish have all the area of button with diagonal
so how I must make to have it ?