Learning opencv step by step

Learning opencv step by step

Postby Antonio Linares » Tue Dec 14, 2021 7:00 am

OpenCV stands for "Open Computer Vision"

Why is it so important ? https://youtu.be/p9IsfqNewmE

1. Download and install OpenCV – 4.5.4 for Windows from https://opencv.org/releases/
2. Install it at c:\opencv
3. Copy c:\opencv\build\x64\vc15\bin\opencv_world454.dll to the folder where you are going to build this test

This tutorial requires FWH 64 bits and Microsoft Visual Studio Community.
Edited: Examples posted here don't require FWH 64 at all.

cv1.prg
Code: Select all  Expand view
#include "FiveWin.ch"

function Main()

   Test()

return nil

#pragma BEGINDUMP

#include <hbapi.h>
#include <opencv.hpp>

using namespace cv;

HB_FUNC( TEST )
{
   cv::Mat img = imread( "007.jpg" );
   
   namedWindow( "image", WINDOW_AUTOSIZE );
   imshow( "image", img );
   waitKey( 0 );
}

#pragma ENDDUMP


go64.bat
Code: Select all  Expand view
@set oldpath=%Path%
@set oldinclude=%INCLUDE%
call "%ProgramFiles(x86)%\Microsoft Visual Studio\2019\Community\VC\Auxiliary\Build\vcvarsall.bat" x86_amd64
c:\harbour\bin\win\msvc64\hbmk2 cv1.hbp -comp=msvc64
@set Path=%oldpath%
@set INCLUDE=%oldinclude%


cv1.hbp
Code: Select all  Expand view
cv1.prg

-cflag=-TP

-Ic:\fwh64\include
-Ic:\opencv\build\include
-Ic:\opencv\build\include\opencv2

-Lc:\fwh64\lib

-lfiveh64
-lfivehc64
-lgdiplus
-lversion
-lOleDlg
-lopencv_world454

-gui

xhb.hbc
hbct.hbc
hbwin.hbc
hbmzip.hbc
hbziparc.hbc
hbfoxpro.hbc

opencvlib.hbp


opencvlib.hbp
Code: Select all  Expand view
-hbimplib opencv_world454.dll


Save this image as 007.jpg
Image

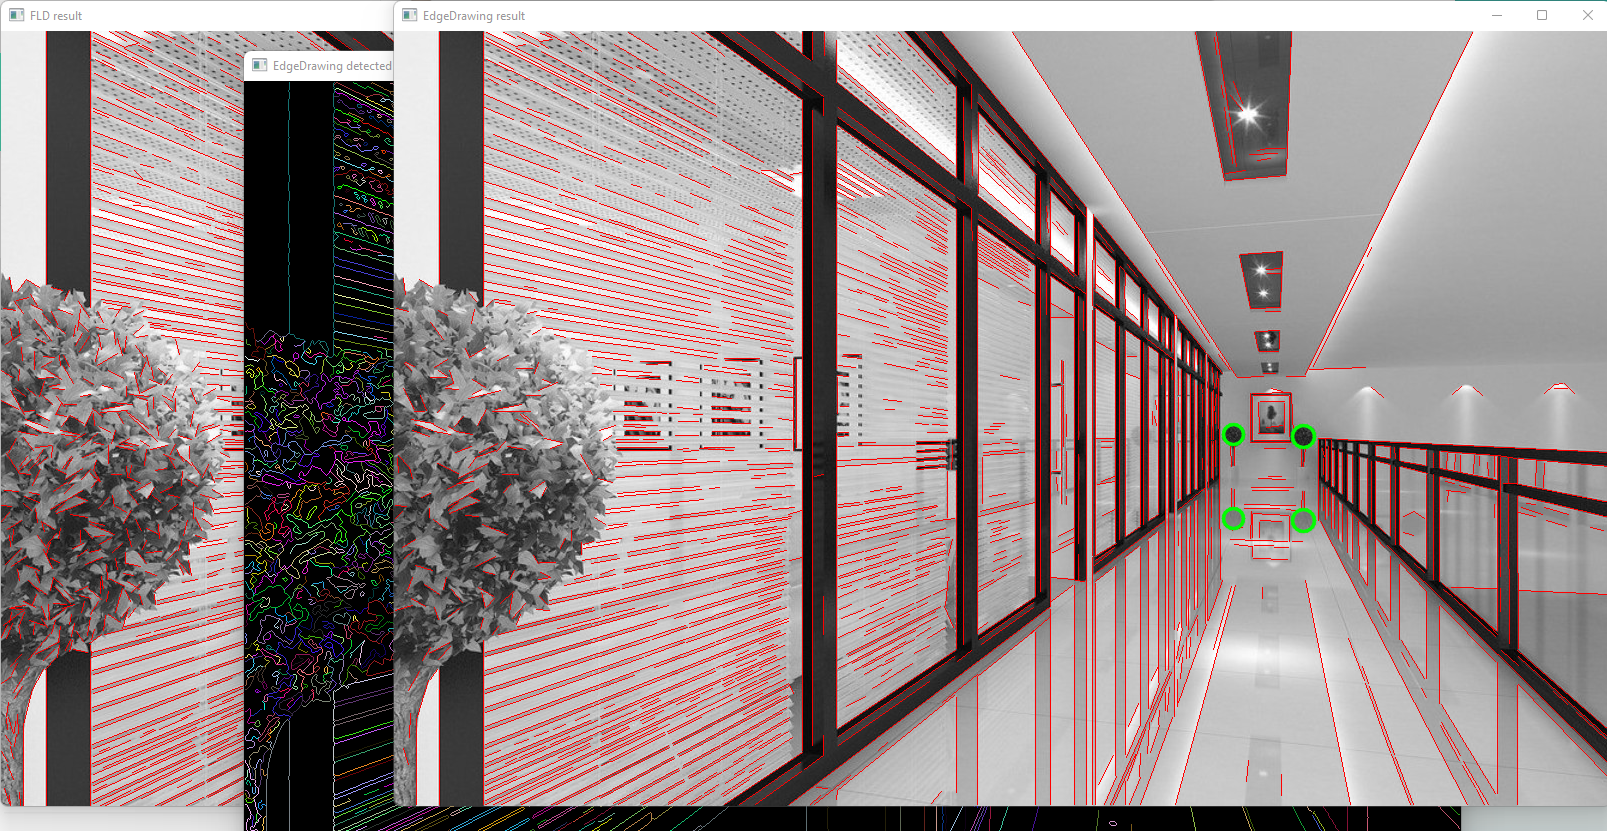
When you run cv1.exe you get this:
Image
regards, saludos

Antonio Linares
www.fivetechsoft.com
User avatar
Antonio Linares
Site Admin
 
Posts: 41312
Joined: Thu Oct 06, 2005 5:47 pm
Location: Spain

Re: Learning opencv step by step

Postby Antonio Linares » Tue Dec 14, 2021 9:21 am

Una vez la prueba de concepto ha funcionado, empezamos a crear el API a usar desde Harbour:

cv1.prg
Code: Select all  Expand view
#include "FiveWin.ch"

#define WINDOW_AUTOSIZE 1

function Main()

   local hMat := cv_ImRead( "007.jpg" )

   cv_namedWindow( "window title", WINDOW_AUTOSIZE )
   cv_ImShow( "window title", hMat )
   cv_WaitKey()

return nil

#pragma BEGINDUMP

#include <hbapi.h>
#include <opencv.hpp>

using namespace cv;

static cv::Mat mat;

HB_FUNC( CV_IMREAD )
{
   mat = imread( hb_parc( 1 ) );

   hb_retptr( &mat );
}

HB_FUNC( CV_NAMEDWINDOW )
{
   namedWindow( hb_parc( 1 ), hb_parnl( 2 ) );
}

HB_FUNC( CV_IMSHOW )
{
   imshow( hb_parc( 1 ), * ( ( cv::Mat * ) hb_parptr( 2 ) ) );
}

HB_FUNC( CV_WAITKEY )
{
   waitKey( hb_parnl( 1 ) );
}

#pragma ENDDUMP
regards, saludos

Antonio Linares
www.fivetechsoft.com
User avatar
Antonio Linares
Site Admin
 
Posts: 41312
Joined: Thu Oct 06, 2005 5:47 pm
Location: Spain

Re: Learning opencv step by step

Postby Antonio Linares » Tue Dec 14, 2021 9:30 am

Opcionalmente si no queremos usar el "namespace" (algo propio de C++) podemos cambiar el código así:

Ojo que en cv1.hbp usamos este flag para indicar que queremos construir en modo C++: (desde el 2015 opencv obliga a usar C++)
-cflag=-TP

cv1.prg
Code: Select all  Expand view
#include "FiveWin.ch"

#define WINDOW_AUTOSIZE 1

function Main()

   local hMat := cv_ImRead( "007.jpg" )

   cv_namedWindow( "window title", WINDOW_AUTOSIZE )
   cv_ImShow( "window title", hMat )
   cv_WaitKey()

return nil

#pragma BEGINDUMP

#include <hbapi.h>
#include <opencv.hpp>

// using namespace cv;

static cv::Mat mat;

HB_FUNC( CV_IMREAD )
{
   mat = cv::imread( hb_parc( 1 ) );

   hb_retptr( &mat );
}

HB_FUNC( CV_NAMEDWINDOW )
{
   cv::namedWindow( hb_parc( 1 ), hb_parnl( 2 ) );
}

HB_FUNC( CV_IMSHOW )
{
   cv::imshow( hb_parc( 1 ), * ( ( cv::Mat * ) hb_parptr( 2 ) ) );
}

HB_FUNC( CV_WAITKEY )
{
   cv::waitKey( hb_parnl( 1 ) );
}

#pragma ENDDUMP
regards, saludos

Antonio Linares
www.fivetechsoft.com
User avatar
Antonio Linares
Site Admin
 
Posts: 41312
Joined: Thu Oct 06, 2005 5:47 pm
Location: Spain

Re: Learning opencv step by step

Postby Baxajaun » Tue Dec 14, 2021 11:56 am

Muchas gracias Antonio !!!

Probados los tres ejemplos :D

Saludos,
User avatar
Baxajaun
 
Posts: 961
Joined: Wed Oct 19, 2005 2:17 pm
Location: Gatika. Bizkaia

Re: Learning opencv step by step

Postby Antonio Linares » Tue Dec 14, 2021 3:23 pm

Next we are going to review the samples provided by opencv:

https://docs.opencv.org/4.5.4/examples.html
regards, saludos

Antonio Linares
www.fivetechsoft.com
User avatar
Antonio Linares
Site Admin
 
Posts: 41312
Joined: Thu Oct 06, 2005 5:47 pm
Location: Spain

Re: Learning opencv step by step

Postby Antonio Linares » Tue Dec 14, 2021 7:44 pm

First of all we need to git clone https://github.com/opencv/opencv_contrib being at c:\

We are going to use this go.bat to build the examples using Visual Studio Community:

go.bat
Code: Select all  Expand view
@set oldpath=%Path%
@set oldinclude=%INCLUDE%
call "%ProgramFiles(x86)%\Microsoft Visual Studio\2019\Community\VC\Auxiliary\Build\vcvarsall.bat" x86_amd64
cl /EHsc test1.cpp -Ic:\opencv\build\include -Ic:\opencv_contrib\modules\ximgproc\include c:\opencv\build\x64\vc15\lib\opencv_world454.lib
@set Path=%oldpath%
@set INCLUDE=%oldinclude%


We need to use the cl.exe /EHsc flag cause this:
"/EHsc" specifies that only standard C++ ("synchronous") exceptions will be caught,
and `extern "C"` functions will not throw exceptions.
This is recommended when writing portable, platform-independent code.
regards, saludos

Antonio Linares
www.fivetechsoft.com
User avatar
Antonio Linares
Site Admin
 
Posts: 41312
Joined: Thu Oct 06, 2005 5:47 pm
Location: Spain

Re: Learning opencv step by step

Postby Antonio Linares » Tue Dec 14, 2021 8:35 pm

We have two unresolved externals to solve:

test1.obj : error LNK2019: unresolved external symbol "struct cv::Ptr<class cv::ximgproc::EdgeDrawing> __cdecl cv::ximgproc::createEdgeDrawing(void)" (?createEdgeDrawing@ximgproc@cv@@YA?AU?$Ptr@VEdgeDrawing@ximgproc@cv@@@2@XZ) referenced in function main
test1.obj : error LNK2019: unresolved external symbol "struct cv::Ptr<class cv::ximgproc::FastLineDetector> __cdecl cv::ximgproc::createFastLineDetector(int,float,double,double,int,bool)" (?createFastLineDetector@ximgproc@cv@@YA?AU?$Ptr@VFastLineDetector@ximgproc@cv@@@2@HMNNH_N@Z) referenced in function main
test1.exe : fatal error LNK1120: 2 unresolved externals


We need to build the opencv_contrib library this way:
https://github.com/opencv/opencv_contrib#how-to-build-opencv-with-extra-modules

cd opencv_fwh

build.bat
Code: Select all  Expand view
@set oldpath=%Path%
@set oldinclude=%INCLUDE%
call "%ProgramFiles(x86)%\Microsoft Visual Studio\2019\Community\VC\Auxiliary\Build\vcvarsall.bat" x86_amd64
cmake -DOPENCV_EXTRA_MODULES_PATH=c:\opencv_contrib\modules c:\opencv\sources
msbuild OpenCV.sln /p:Configuration=Release /t:Clean,Build
@set Path=%oldpath%
@set INCLUDE=%oldinclude%


Important: Please delete c:\opencv\sources\CMakeCache.txt before running build.bat
regards, saludos

Antonio Linares
www.fivetechsoft.com
User avatar
Antonio Linares
Site Admin
 
Posts: 41312
Joined: Thu Oct 06, 2005 5:47 pm
Location: Spain

Re: Learning opencv step by step

Postby Antonio Linares » Wed Dec 15, 2021 9:44 am

Now that we have properly built the opencv contribs we modify go.bat this way to run the examples:

go.bat
Code: Select all  Expand view
@set oldpath=%Path%
@set oldinclude=%INCLUDE%
call "%ProgramFiles(x86)%\Microsoft Visual Studio\2019\Community\VC\Auxiliary\Build\vcvarsall.bat" x86_amd64
cl /EHsc test1.cpp -Ic:\opencv\build\include -Ic:\opencv_contrib\modules\ximgproc\include c:\opencv\build\x64\vc15\lib\opencv_world454.lib c:\opencv_fwh\lib\Release\opencv_ximgproc454.lib
@set Path=%oldpath%
@set INCLUDE=%oldinclude%


test1.cpp contains the source code for the first example https://docs.opencv.org/4.5.4/d1/d9e/fld_lines_8cpp-example.html
Missing DLLs must be copied from c:\opencv_fwh\lib\Release\ to c:\opencv_fwh (where the resulting test1.exe is located)

The example is working fine and amazingly detects the edge lines of a photo:
Image
regards, saludos

Antonio Linares
www.fivetechsoft.com
User avatar
Antonio Linares
Site Admin
 
Posts: 41312
Joined: Thu Oct 06, 2005 5:47 pm
Location: Spain

Re: Learning opencv step by step

Postby Baxajaun » Wed Dec 15, 2021 11:02 am

Antonio,

sigue, sigue que yo te sigo.

Muchas gracias.

Saludos,
User avatar
Baxajaun
 
Posts: 961
Joined: Wed Oct 19, 2005 2:17 pm
Location: Gatika. Bizkaia

Re: Learning opencv step by step

Postby Antonio Linares » Wed Dec 22, 2021 7:37 am

go.bat
Code: Select all  Expand view
@set oldpath=%Path%
@set oldinclude=%INCLUDE%
call "%ProgramFiles(x86)%\Microsoft Visual Studio\2019\Community\VC\Auxiliary\Build\vcvarsall.bat" x86_amd64
cl /EHsc test1.cpp -Ic:\opencv\build\include -Ic:\opencv_contrib\modules\ximgproc\include -Ic:\opencv_contrib\modules\shape\include c:\opencv\build\x64\vc15\lib\opencv_world454.lib c:\opencv_fwh\lib\Release\opencv_ximgproc454.lib c:\opencv_fwh\lib\Release\opencv_shape454.lib
@set Path=%oldpath%
@set INCLUDE=%oldinclude%


test1.cpp
Code: Select all  Expand view
// -*- coding:utf-8; mode:c++; mode:auto-fill; fill-column:80; -*-

/// @file      cascade-classifier.cpp
/// @brief     OpenCV object recognition example.
/// @author    J. Arrieta <juan.arrieta@nablazerolabs.com>
/// @date      October 04, 2017
/// @copyright (c) 2017 Nabla Zero Labs
/// @license   MIT License.
///
/// I wrote this example program for my later reference.
///
/// Compilation:
///
///     clang++ cascade-classifier.cpp -o cascade-classifier \
///     -std=c++1z -Wall -Wextra -Ofast -march=native \
///     -lopencv_objdetect -lopencv_highgui \
///     -lopencv_imgproc -lopencv_core -lopencv_videoio
///
/// The Haar cascade XML description is provided as a command-line argument; the
/// examples I used are in GitHub:
///
///     https://github.com/opencv/opencv/tree/m ... arcascades
///

// C++ Standard Library
#include <cstdlib>
#include <iostream>
#include <vector>

// OpenCV
#include <opencv2/opencv.hpp>
#include <opencv2/highgui/highgui_c.h>

#define     CV_HAAR_SCALE_IMAGE   2

int main(int argc, char* argv[]) {
  if (argc != 2) {
    std::cerr << "usage: " << argv[0] << " classifier.xml\n";
    std::exit(EXIT_FAILURE);
  }

  // Load a classifier from its XML description
  cv::CascadeClassifier classifier(argv[1]);

  // Prepare a display window
  const char* const window_name{"Facial Recognition Window"};

  cv::namedWindow(window_name, CV_WINDOW_AUTOSIZE);

  // Prepare a video capture device
  cv::VideoCapture capture(0); // `0` means "default video capture"
  if (! capture.isOpened()) {
    std::cerr << "cannot open video capture device\n";
    std::exit(EXIT_FAILURE);
  }

  // Prepare an image where to store the video frames, and an image to store a
  // grayscale version
  cv::Mat image;
  cv::Mat grayscale_image;

  // Prepare a vector where the detected features will be stored
  std::vector<cv::Rect> features;

  // Main loop
  while (capture.read(image) && (! image.empty())) {
    // Create a normalized, gray-scale version of the captured image
    cv::cvtColor(image, grayscale_image, CV_BGR2GRAY);
    cv::equalizeHist(grayscale_image, grayscale_image);

    // Detect the features in the normalized, gray-scale version of the
    // image. You don't need to clear the previously-found features because the
    // detectMultiScale method will clear before adding new features.
    classifier.detectMultiScale(grayscale_image, features, 1.1, 2,
                                0 | CV_HAAR_SCALE_IMAGE, cv::Size(30, 30));

    // Draw each feature as a separate green rectangle
    for (auto&& feature : features) {
      cv::rectangle(image, feature, cv::Scalar(0, 255, 0), 2);
    }

    // Show the captured image and the detected features
    cv::imshow(window_name, image);

    // Wait for input or process the next frame
    switch (cv::waitKey(10)) {
      case 'q':
        std::exit(EXIT_SUCCESS);
      case 'Q':
        std::exit(EXIT_SUCCESS);
      default:
        break;
    }
  }
  return EXIT_SUCCESS;
}


Usage:
test1.exe c:\opencv\sources\data\haarcascades\haarcascade_frontalface_alt.xml

Results: a window is opened, showing the camera and it recognizes your face :-)
Image
regards, saludos

Antonio Linares
www.fivetechsoft.com
User avatar
Antonio Linares
Site Admin
 
Posts: 41312
Joined: Thu Oct 06, 2005 5:47 pm
Location: Spain

Re: Learning opencv step by step

Postby Antonio Linares » Wed Dec 22, 2021 11:04 am

Next we need to learn how to create our own Haar Cascade:

https://youtu.be/jG3bu0tjFbk

Image
regards, saludos

Antonio Linares
www.fivetechsoft.com
User avatar
Antonio Linares
Site Admin
 
Posts: 41312
Joined: Thu Oct 06, 2005 5:47 pm
Location: Spain

Re: Learning opencv step by step

Postby Antonio Linares » Wed Dec 22, 2021 11:24 am

100 x 100 for negatives

50 x 50 for positives
regards, saludos

Antonio Linares
www.fivetechsoft.com
User avatar
Antonio Linares
Site Admin
 
Posts: 41312
Joined: Thu Oct 06, 2005 5:47 pm
Location: Spain

Re: Learning opencv step by step

Postby Antonio Linares » Wed Dec 22, 2021 11:27 am

Another video:
https://youtu.be/fgx5LDOx4JY

This video provide these utilities to easily create a Haar Cascade file for your own object recognition needs:
https://github.com/FiveTechSoft/FWH_tools/blob/master/anas_haartrain.rar
I copy it here as a safety backup of use for everybody, so it don't get lost (just in case)

With the above tools YOU can create your own XML file that works with the latest example published here (with some changes) !!!
regards, saludos

Antonio Linares
www.fivetechsoft.com
User avatar
Antonio Linares
Site Admin
 
Posts: 41312
Joined: Thu Oct 06, 2005 5:47 pm
Location: Spain

Re: Learning opencv step by step

Postby Antonio Linares » Wed Dec 22, 2021 6:32 pm

https://docs.opencv.org/4.x/dc/d88/tutorial_traincascade.html

https://medium.com/analytics-vidhya/haar-cascades-explained-38210e57970d

Code: Select all  Expand view
import numpy as np
import cv2
f_cascade = cv2.CascadeClassifier("face.xml")
e_cascade = cv2.CascadeClassifier("eye.xml")
image = cv2.imread("actor.jpg")
gray = cv2.cvtColor(img, cv2.COLOR_BGR2GRAY)
faces = f_cascade.detectMultiScale(gray, 1.3, 5)
for (x,y,w,h) in faces:
    img = cv2.rectangle(img,(x,y),(x+w,y+h),(255,0,0),2)
    roi_gray = gray[y:y+h, x:x+w]
    roi_color = img[y:y+h, x:x+w]
    eyes = e_cascade.detectMultiScale(roi_gray)
    for (ex,ey,ew,eh) in eyes:
        cv2.rectangle(roi_color,(ex,ey),(ex+ew,ey+eh),(0,255,0),2)
cv2.imshow('img',image)
cv2.waitKey(0)
cv2.destroyAllWindows()
regards, saludos

Antonio Linares
www.fivetechsoft.com
User avatar
Antonio Linares
Site Admin
 
Posts: 41312
Joined: Thu Oct 06, 2005 5:47 pm
Location: Spain

Re: Learning opencv step by step

Postby Antonio Linares » Thu Dec 23, 2021 5:43 pm

Another software to create Haar Cascades:

https://amin-ahmadi.com/cascade-trainer-gui/
regards, saludos

Antonio Linares
www.fivetechsoft.com
User avatar
Antonio Linares
Site Admin
 
Posts: 41312
Joined: Thu Oct 06, 2005 5:47 pm
Location: Spain

Next

Return to FiveWin for Harbour/xHarbour

Who is online

Users browsing this forum: No registered users and 7 guests